
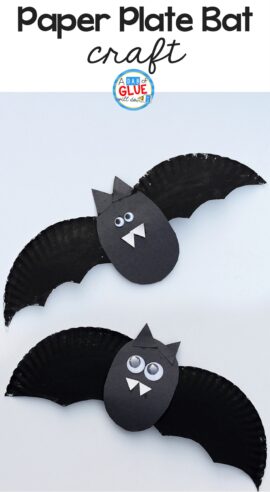
Today we’re sharing a super cute paper plate bat craft! This is a fun and simple craft to do with preschool, kindergarten, or elementary students to go along with bat books or to decorate the home or classroom for Halloween. These bats are adorable with their pointy teeth, and aren’t too scary!
Materials Needed for the Paper Plate Bat Craft:
We chose to paint our paper plates with black paint, but to make this craft even simpler, you can use black paper plates and cut them for the wings.
Getting the Paper Plate Bat Ready:
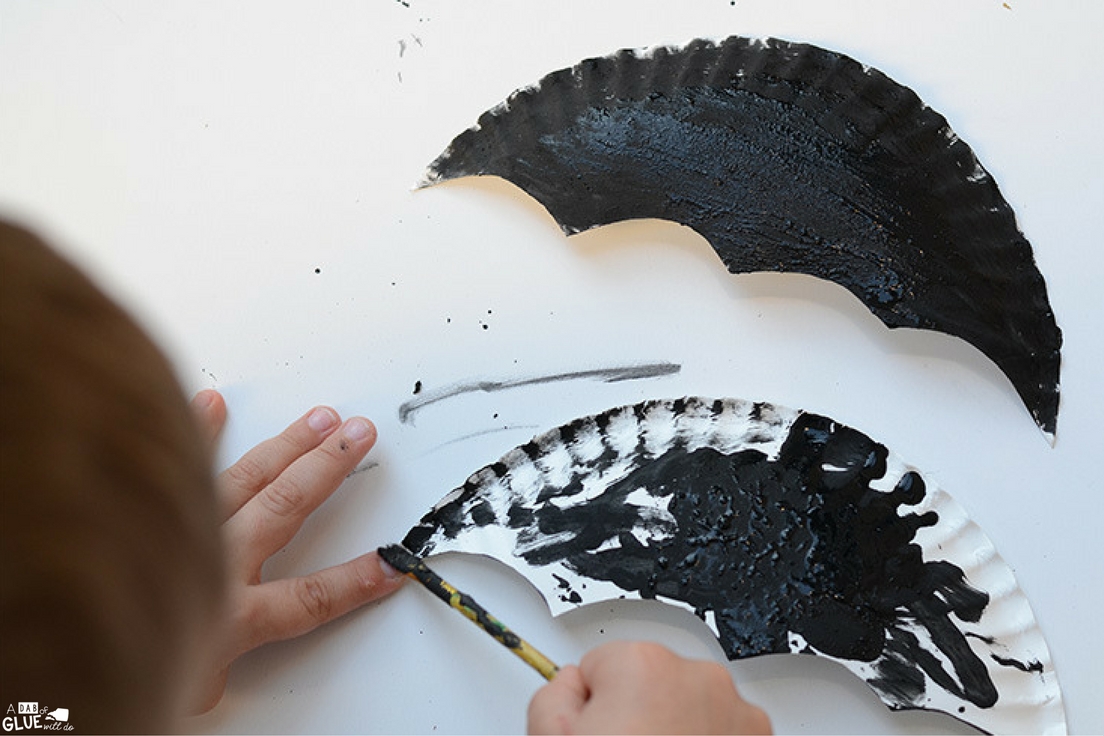
To get this craft ready, pre cut the wing shapes from the paper plate.
To do this, draw a scalloped line across the paper plate (draw it a bit less than center).
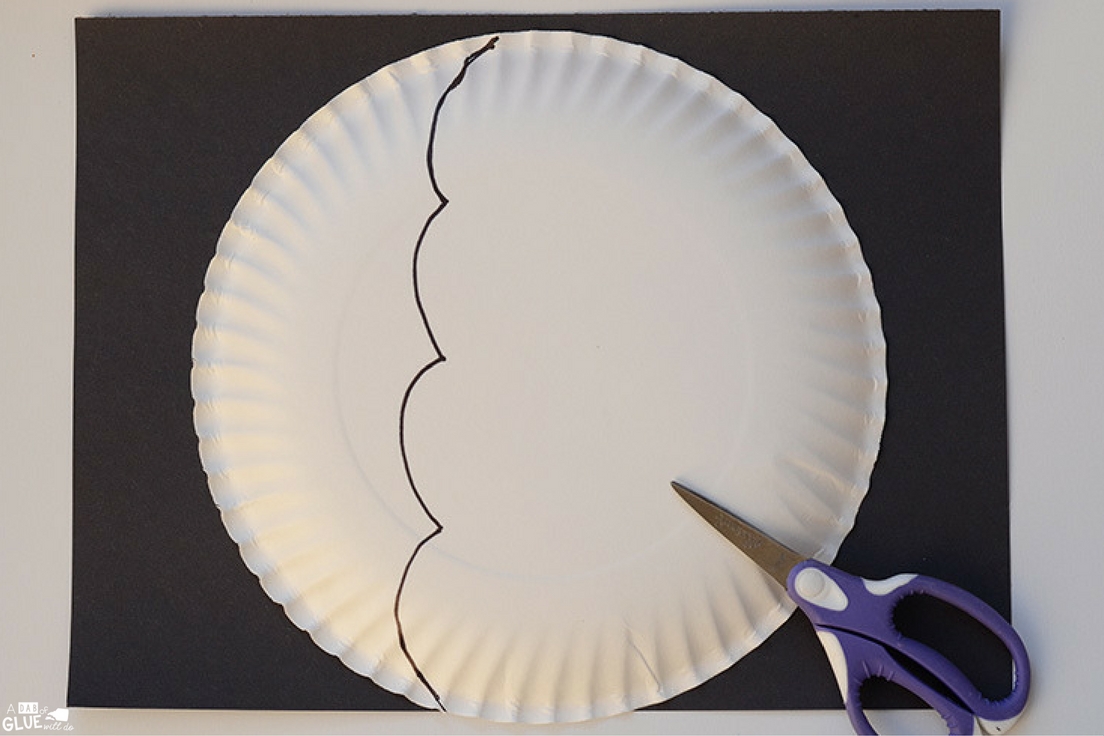
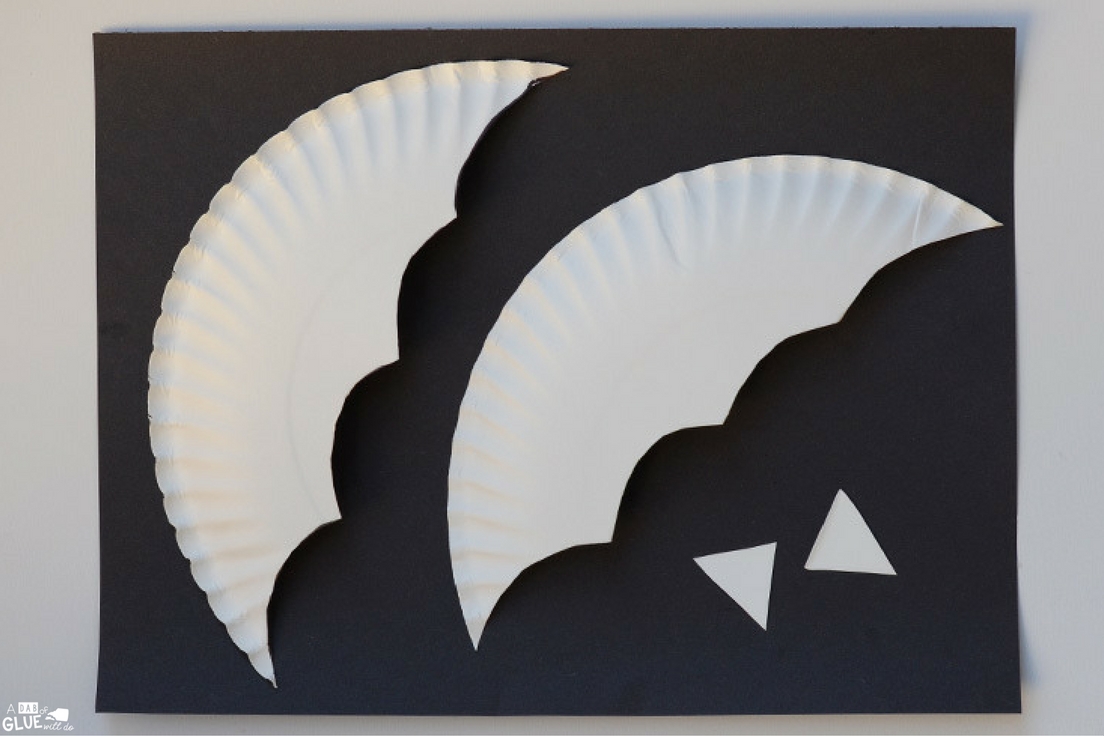
Cut out the wing shape. Use it as a guide to cut out the second wing from the other side of the paper plate. Now you have two bat wings.
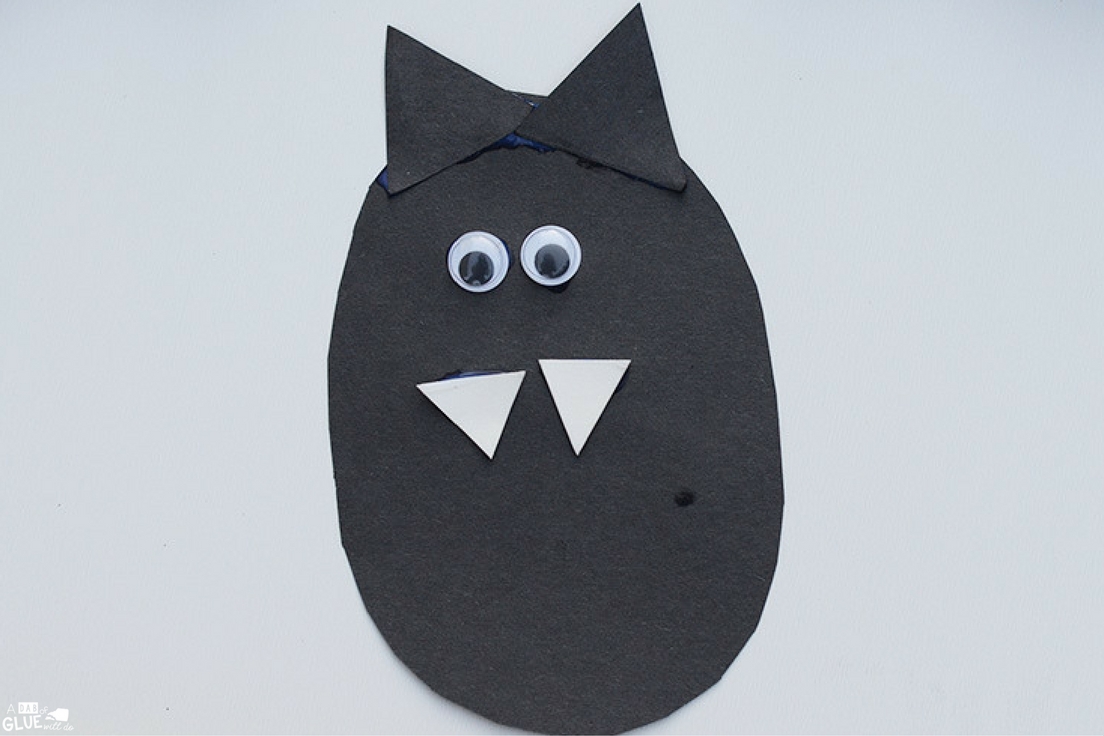
I also cut two teeth from the paper plate scraps.
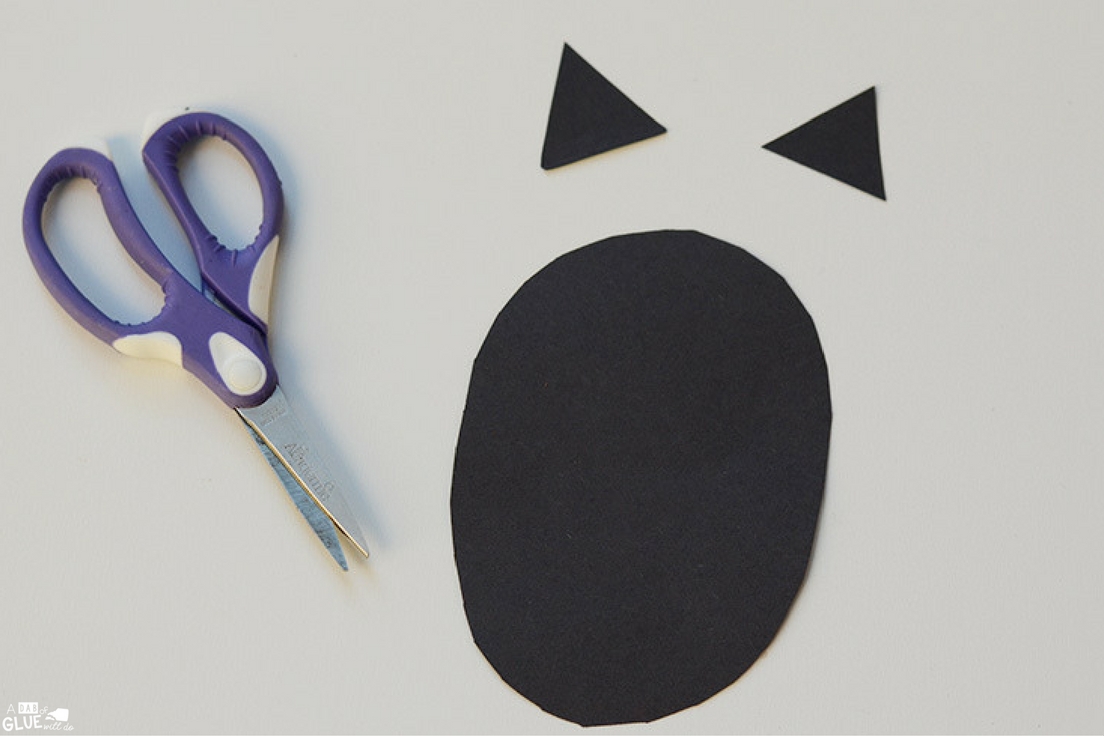
Next, make the bat body shapes using the black construction paper.
Make an oval for the body, and two triangles for the ears.
Doing the Paper Plate Bat Craft:
Now it’s time to paint! Paint each paper plate bat wing with black paint. Set aside to let the paint dry.
Using the oval, triangles, and googly eyes, assemble the bat body to make a cute bat face. Set aside to let the glue dry.
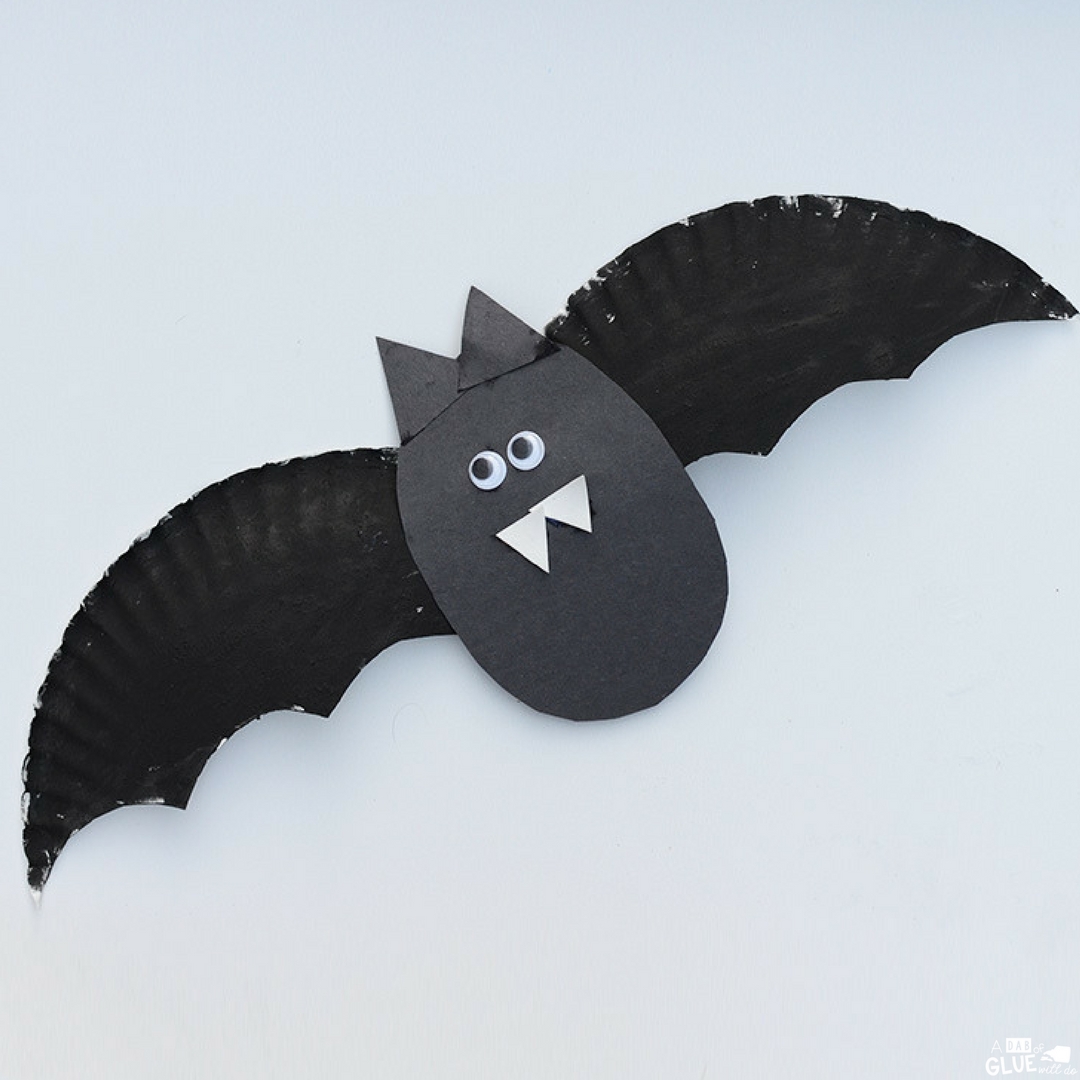
After the glue and paint is dry, overlap the bat wings and tape them together. Next, tape the back of the bat body to the wings.
Now you have a finished bat!
These look great for window or wall decorations, or even attached to string to make them look like they’re flying around the classroom.
Need more bat activities?
12 Bat Books for Little Learners
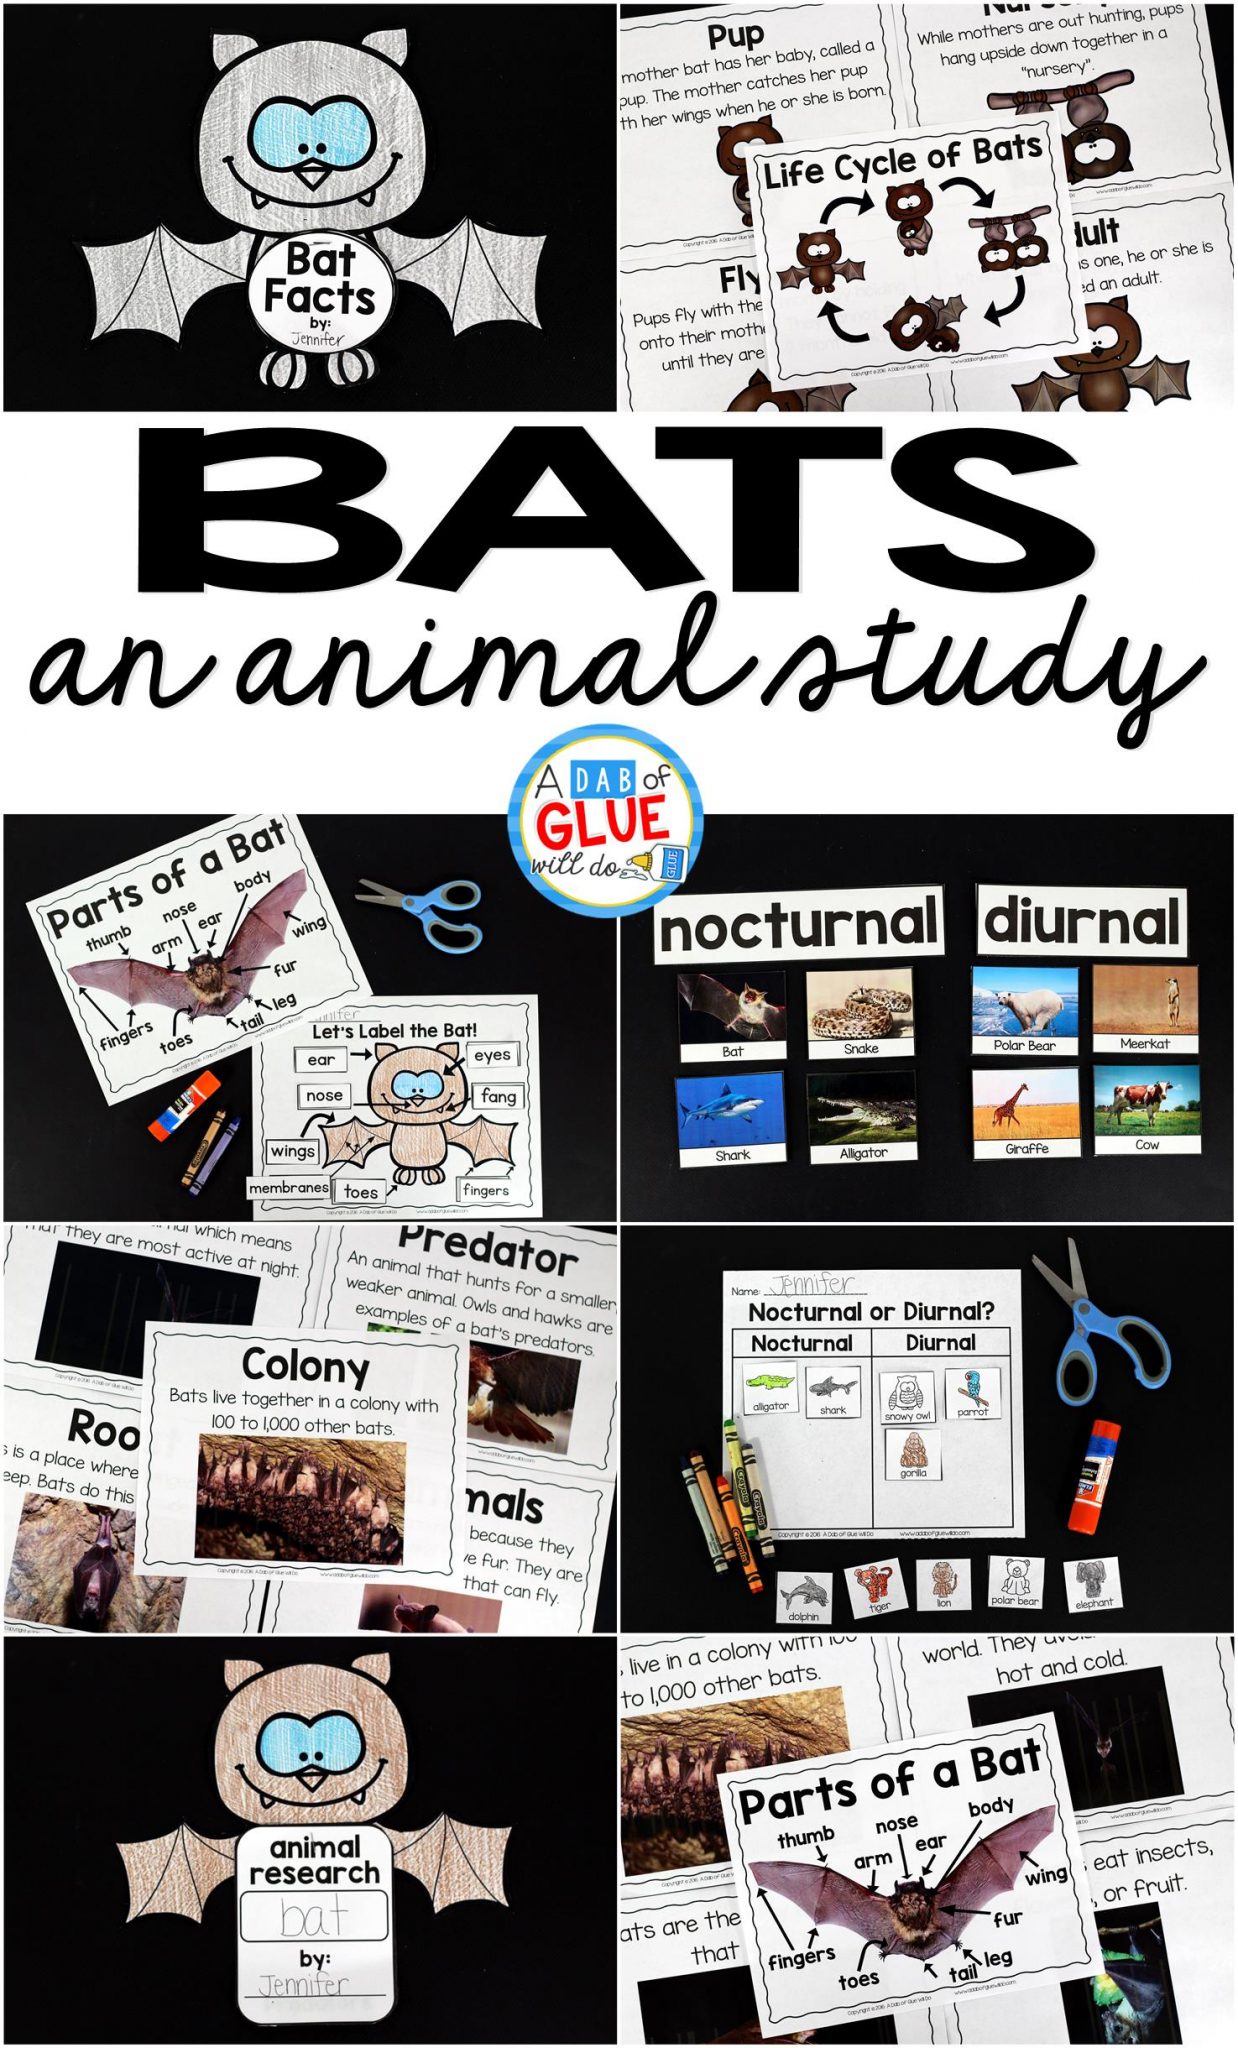
You might also like Bats: An Animal Study
What are your favorite bat activities for your classroom?

Thank you for sharing with us, I think this website really stands out : D.