
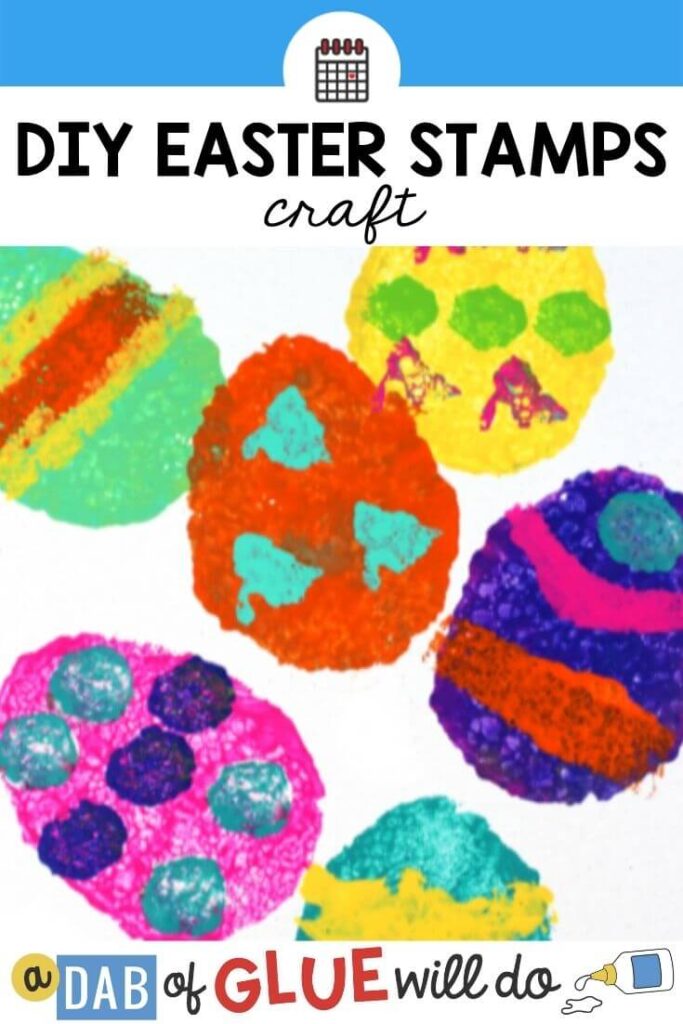
Are you in need of an easy yet fun idea for Easter? These DIY Easter stamps for kids can be made in your classroom or at home with materials that you likely already have on hand. Work on fine motor skills as well when you use these fun stamps.
Materials Needed for the DIY Easter stamps for kids:
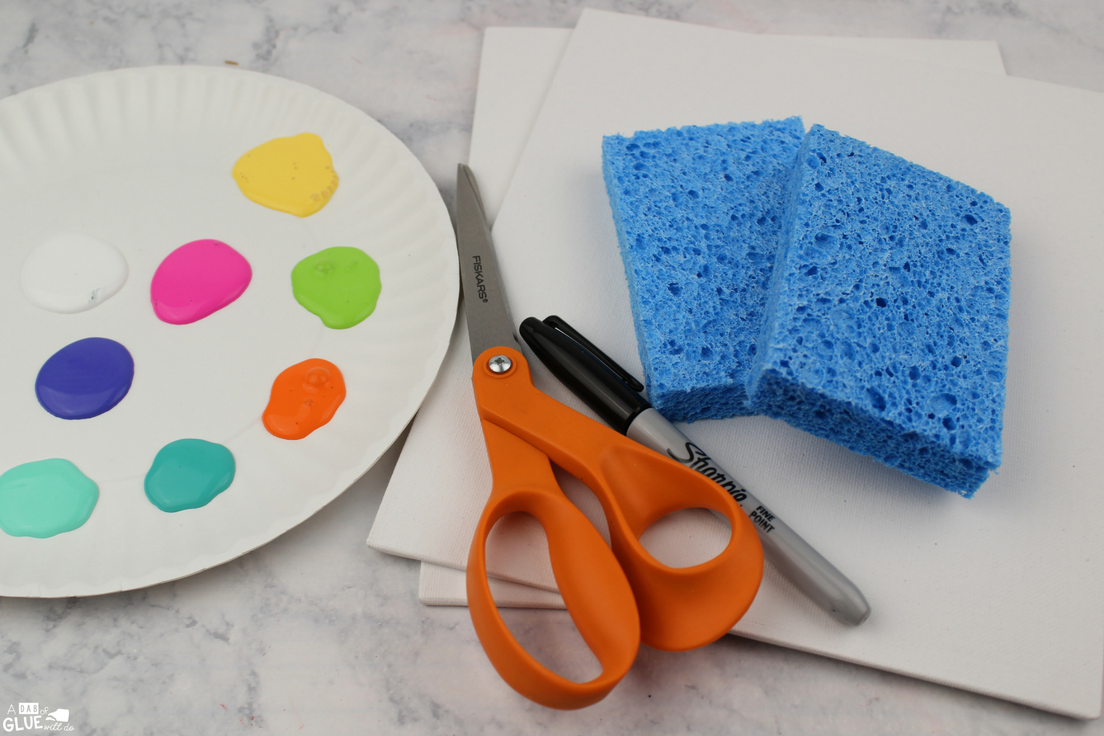
- Paint
- Canvas
- Sponges
- Permanent Marker
- Scissors
Getting the DIY Easter Stamps Ready:
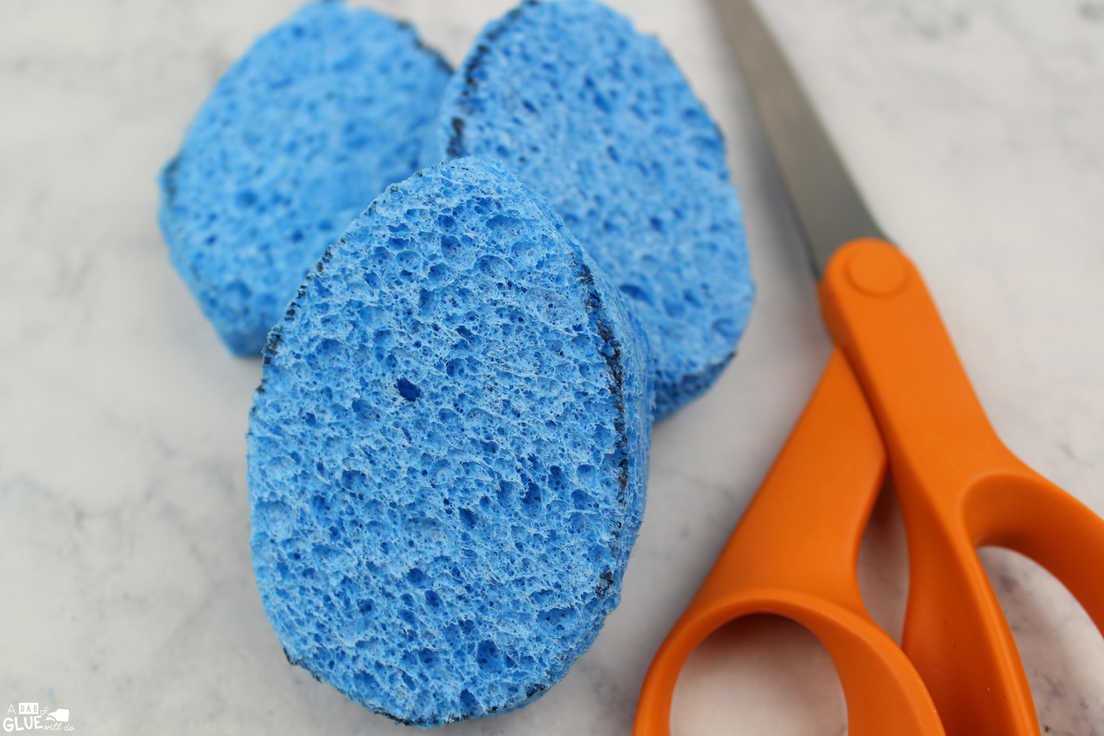
Trace the shape of an egg onto a sponge. Do this for each color egg you’ll want to stamp. Cut out the egg shape from the sponges.
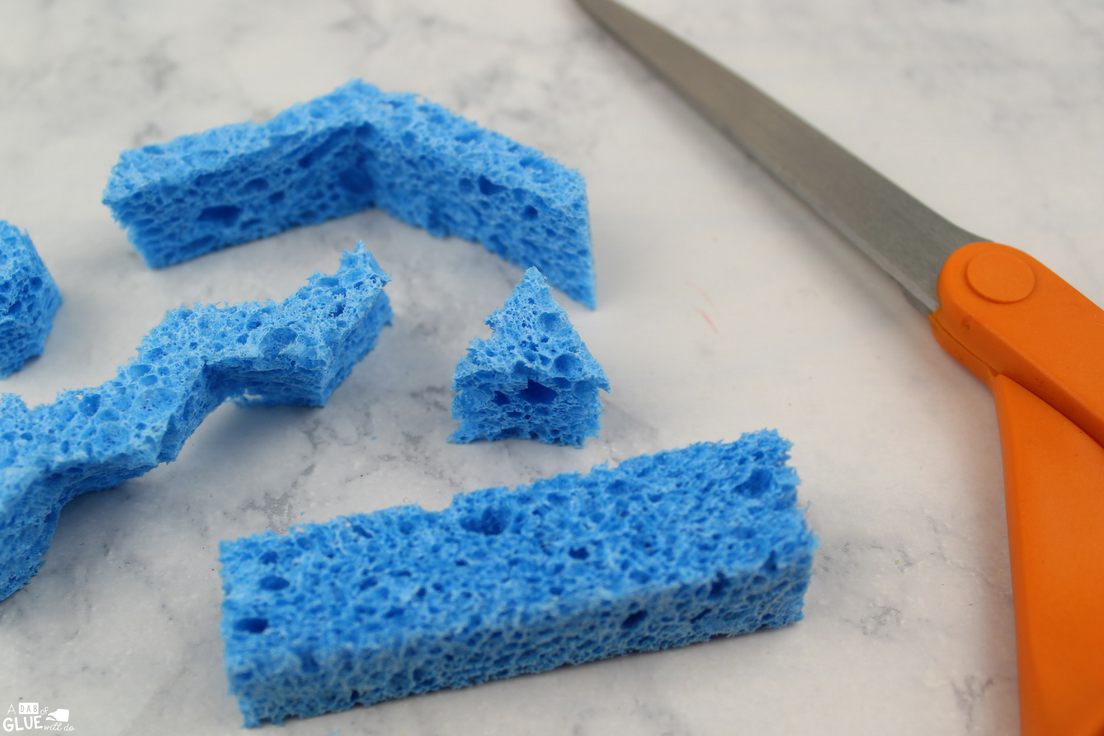
Use the sponge scraps to cut out shapes like a circle, triangle, zig zag line etc.
Doing the DIY Easter Stamps for Kids:

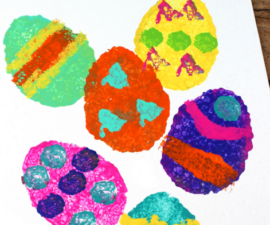
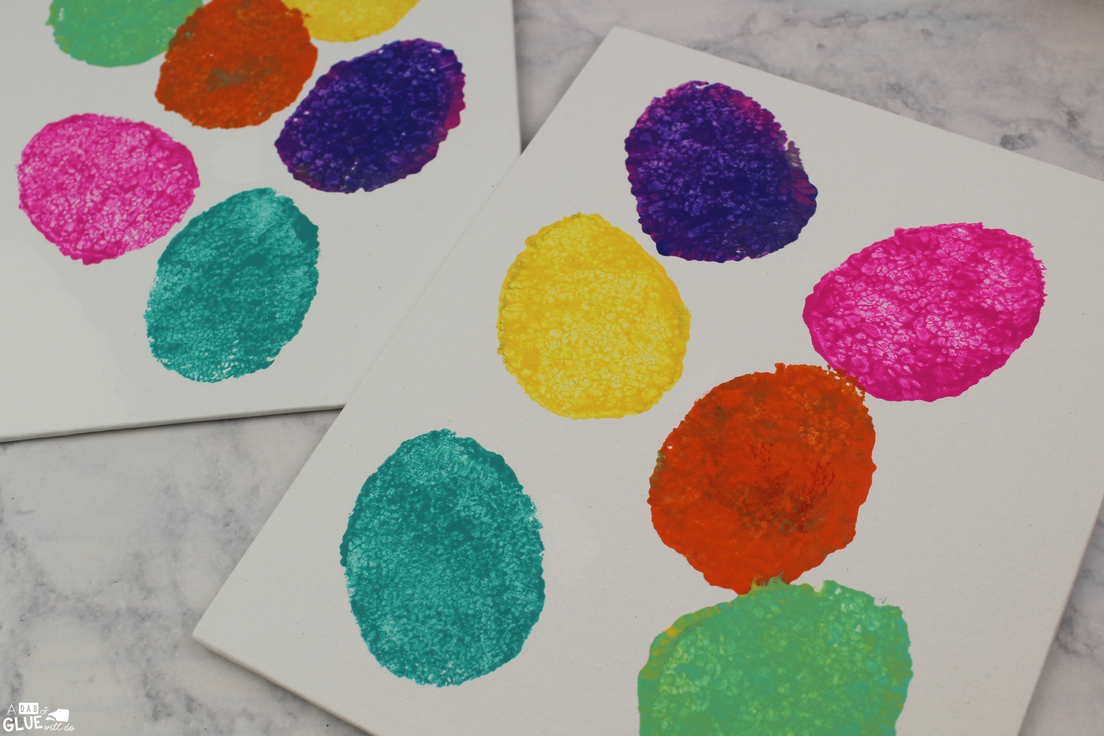
Dip the egg shaped sponges into paint and press them onto the canvas. Encourage students to use only one egg sponge in each color. This will help the colors to stay bright!
Allow the paint to dry completely before decorating each egg. It might be a good idea to have a side project lined up like Flower Match-Ups for students to review math or literacy facts while they wait for the paint to dry.
Once the paint is completly dry, use the sponge shapes to add detail to each egg. I love this part!
Dip them into the paint and have some fun!
Cut some thin pointed lines from the sponges and add some grass blades at the bottom if you’d like.
Then hang your creations on your student displays!
Need more Easter ideas?
Easter Book for Little Learners
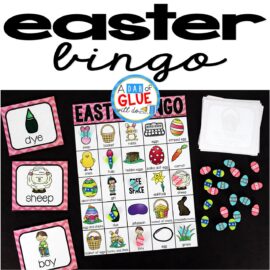
You might also like Easter Bingo!
Usually I don’t read post on blogs, but I would like to say that this write-up very forced me to try and do so! Your writing style has been surprised me. Thanks, very nice article.