• Skip to main content
  • Skip to primary sidebar
  • Shop
  • Home
  • Blog
  • About
  • Amazon Favorites
  • Login

A Dab of Glue Will Do

Little Learners, Big Ideas

  • Literacy
  • Math
  • Science
  • Seasonal
  • Teacher Ideas
  • Membership
Home
  • SHOP
  • Blog
    • Literacy
    • Math
    • Science
    • Seasonal
    • Teacher Ideas
  • Membership
  • Amazon Favorites
  • About

PSPKK12

Glow Stick Science Experiment

I'd love it if you shared!

105 shares
  • Facebook
  • Twitter
  • Reddit

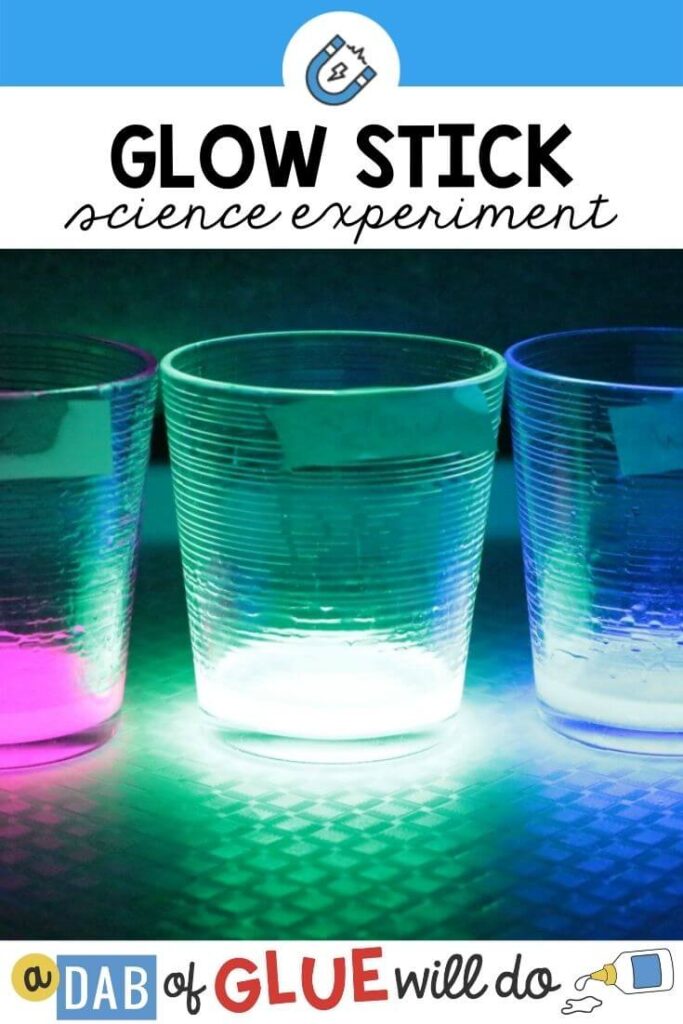
Most kids love glow-in the dark things. Using glow sticks, you can set up a science demonstration lab that shows children how chemical reactions work, and teaches them about the light spectrum at the same time. Since glow sticks do use chemicals, it is not recommended to let the kids touch any of the glow liquid. However, the glow stick science demonstration can effectively illustrate several scientific concepts that will teach more about light, chemical reactions, and energy.

3 cups on a table in the dark with glowing liquid inside

Getting the Glow Stick Science Experiment Ready

The set up for this experiment is a bit tricky and should only be done by a teacher.
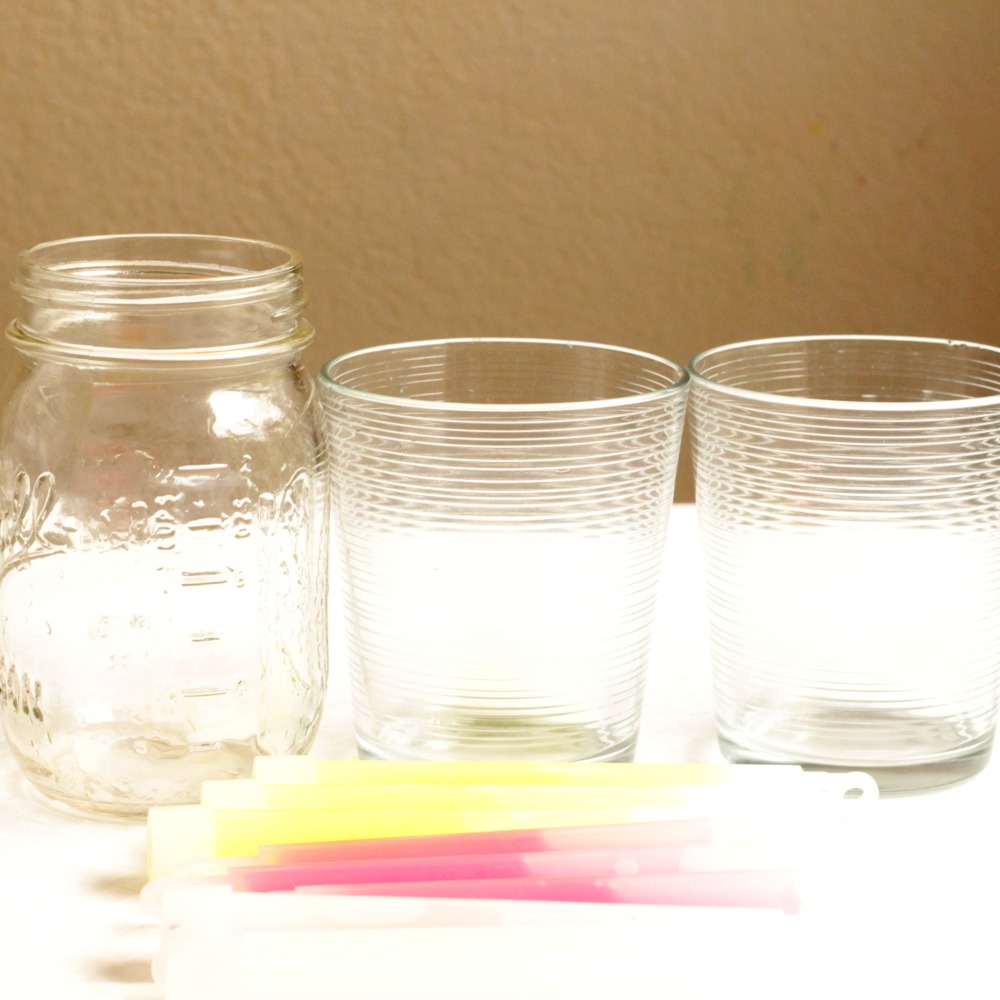
You will need:

  • 3 colors of glow sticks: yellow, blue, and pink (we found jumbo glow sticks worked best)
  • 6 small glass containers
  • 1 plastic tray
  • Paper towels
  • Knife
  • Mesh colander
  • Latex gloves
  • Safety goggles
Kids can learn about the chemical properties of glow sticks and how they create glowing light in the glow stick science lab.

Label two jars with each color name (so two pinks, two yellows, etc.). Put on your gloves and safety goggles.

Carefully cut open the top of each glow stick with a knife.

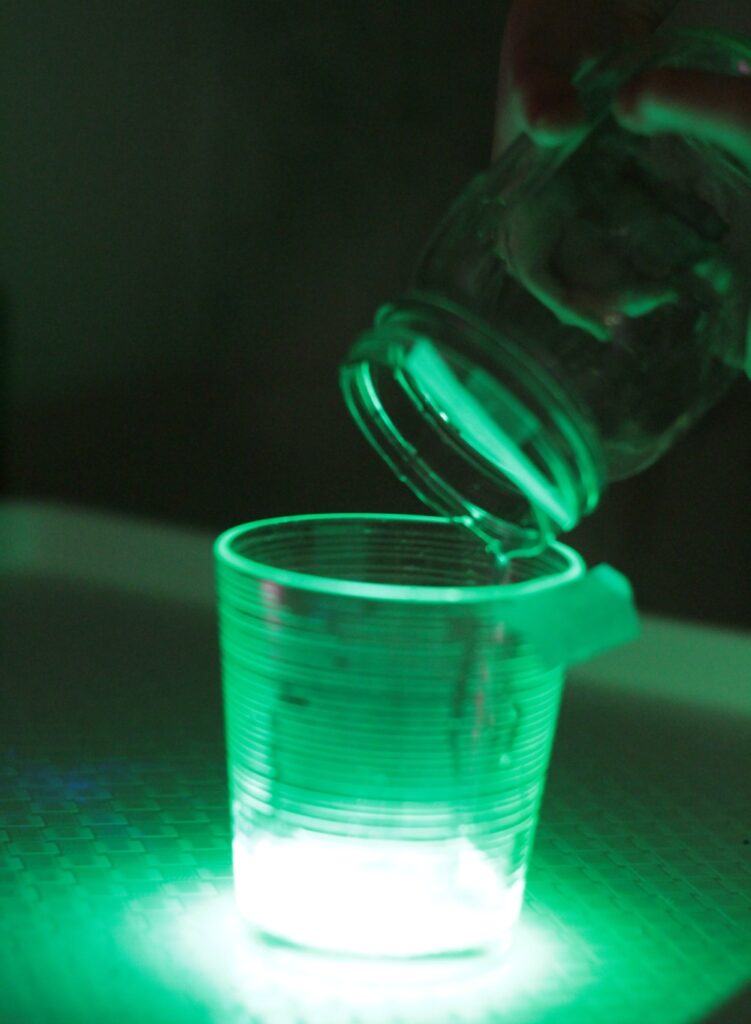
Pour the liquid into one container labeled with that color.

Kids can learn about the chemical properties of glow sticks and how they create glowing light in the glow stick science lab.

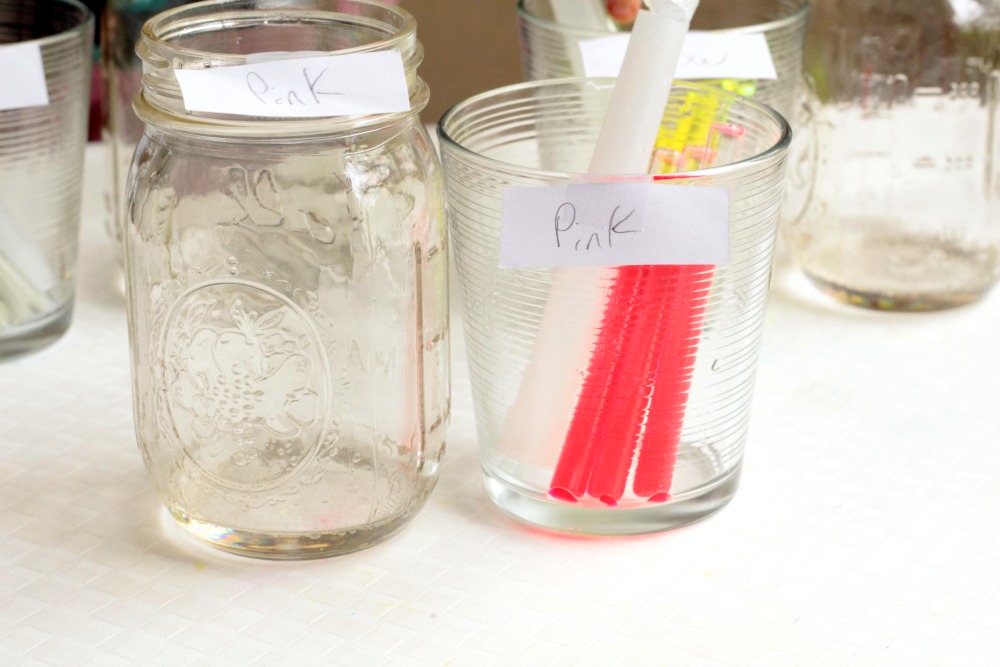
Rinse out the inside of the glow stick with water and the glass rod inside the stick.

Carefully break open the glass tube inside the plastic tube and pour the center liquid into the other container labeled with that color’s name. Make sure you’re not getting any glass shards into the containers, which you can prevent by using a mesh colander.

Kids can learn about the chemical properties of glow sticks and how they create glowing light in the glow stick science lab.

Repeat this process for each glow stick. If you don’t rinse the tubes well enough, the chemicals will start to react before you’re ready to start the demonstration. So it is important to make sure they are clean before opening the center rod.

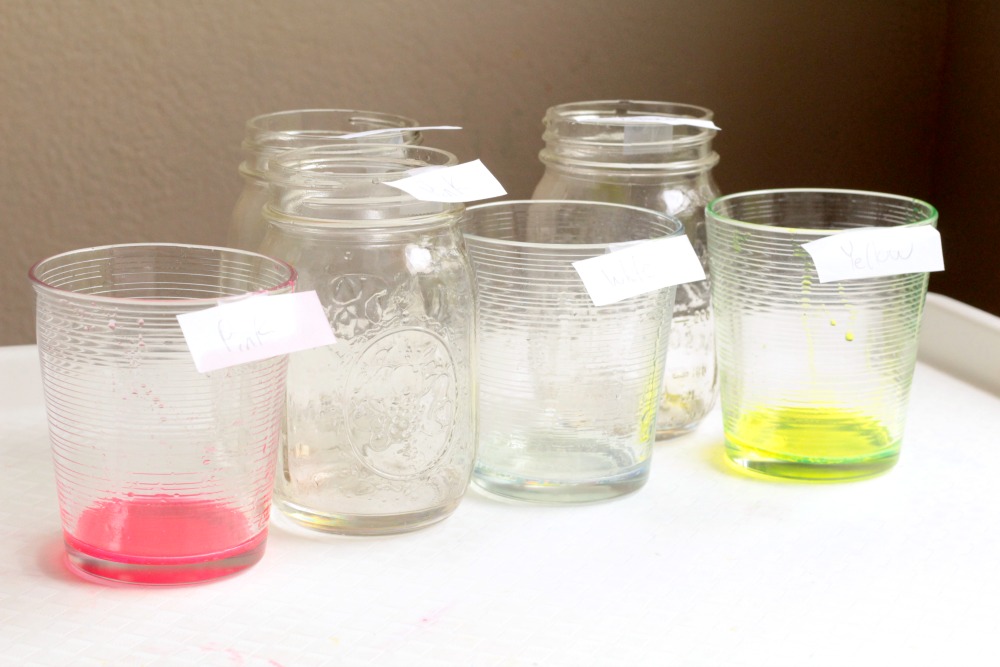
We used three glow sticks per color, but the more you open, the more liquid you will have to illustrate the science lesson.

Glow Stick Science Experiment Safety

The chemicals in glow sticks are non-toxic. However, they are extremely bitter to taste and should not be handled by children. When doing this science demonstration, it is recommended to wear latex gloves, wear safety goggles, and only allow teachers or parents to handle the glow stick fluid. This will ensure maximum safety.

Doing the Glow Stick Science Experiment

Kids can learn about the chemical properties of glow sticks and how they create glowing light in the glow stick science lab.

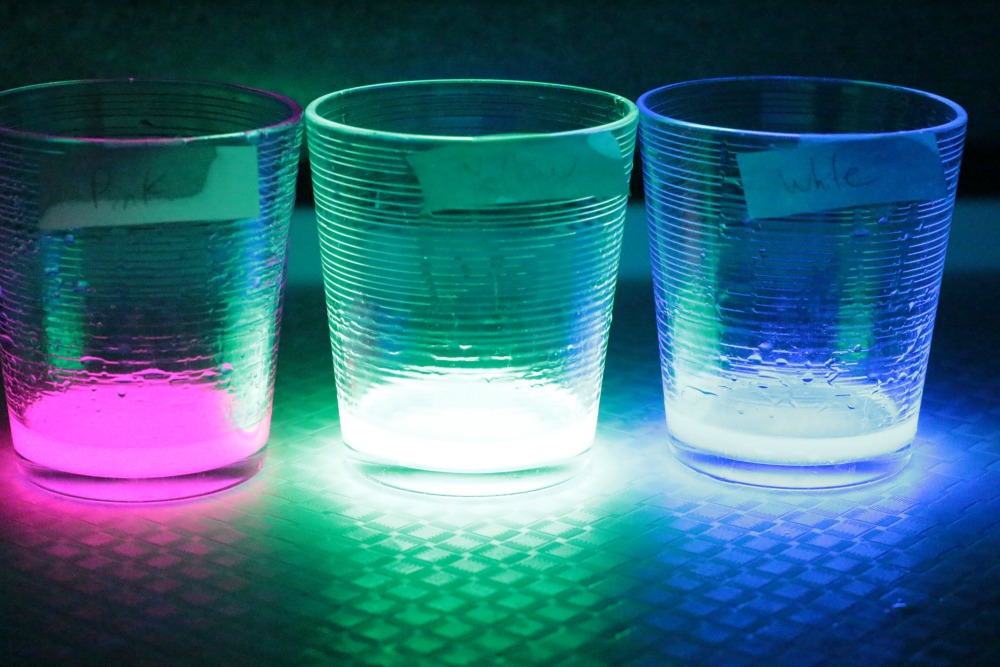
Once all colors are out of the glow sticks, place the containers on your tray. Turn off the lights and show the kids how the fluids are not yet reacting and are not glowing at all.

Carefully pour the two liquids together, one color at a time. Kids will love how quickly the solution starts to glow. At this point, you can talk about why the liquid lights up and what chemical properties are causing this interesting and colorful reaction.

Kids can learn about the chemical properties of glow sticks and how they create glowing light in the glow stick science lab.

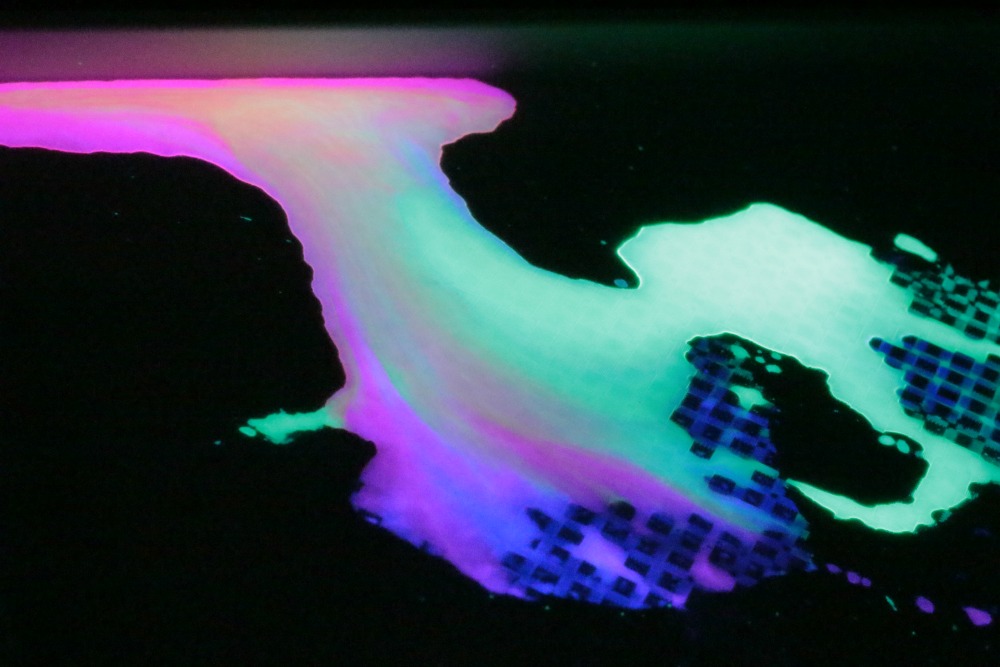
After all colors are mixed, show the kids how when you mix all of the colors, the combined liquid starts to give off a white light. This is because the colors start reflecting all light frequencies, so individual color is no longer visible.

Kids can learn about the chemical properties of glow sticks and how they create glowing light in the glow stick science lab.

The Science Behind Glow Sticks

Kids can learn about the chemical properties of glow sticks and how they create glowing light in the glow stick science lab.

Glow sticks contain two sets of chemicals that when combined, create a chemical reaction called Chemiluminescence.

In the outer part of the glow stick, a combination of phenyl oxalate ester and fluorescent dye are used. Inside the glass tube, a combination of hydrogen peroxide and a phthalate ester solvent are mixed. When the two chemicals are mixed, they create a chemical reaction that causes oxygen atoms to move around quickly, which creates an unstable compound that gives off energy. The extra energy from the mixture causes the dyed molecules to move faster, creating a glowing effect.

When the three colors of dye are mixed, they reflect all light, creating a “white light” effect.

More Science Activities and Ideas

Walking Water Science for Kids

Science Notebook

Plants Unit

Want science planned for you ALL YEAR LONG?!

Do you want science planned for the ENTIRE CALENDAR YEAR!? This Endless Science Mega Bundle will save you so much time and keep your students engaged and excited about learning. This amazing resource contains 53 science topics including life science, physical science, earth science, and animal studies.

Filed Under: Experiments, Halloween, Science

You May Also Enjoy These Posts

A child testing homemade slime.Engage your class in an exciting hands-on experience learning more about pumpkins! This Pumpkin Bundle is perfect for centers in Kindergarten, First Grade, and Second Grade classrooms and packed full of inviting student activities. Celebrate Fall with pumpkin themed center student worksheets. Students will learn more about pumpkins using puzzles, worksheets, clip cards, subtraction mats and more! This pack is great for homeschoolers, hands-on kids activities, and to add to your unit studies! Teachers will receive the complete unit for Autumn pumpkin math, science, and literacy activities to help teach about pumpkins to your lower elementary students!A child checking off a paper titled "Fall Scavenger Hunt" with pictures of different outdoor fall items on it.

Reader Interactions

Leave a Comment Cancel reply

Your email address will not be published. Required fields are marked *

This site uses Akismet to reduce spam. Learn how your comment data is processed.

Primary Sidebar

Grade Level Key

  • PS PreSchool
  • PK Pre-K
  • K Kindergarten
  • 1 First Grade
  • 2 Second Grade

Hello Friends!

I’m Jennifer…. I taught Kindergarten and 1st grade. At a Dab of Glue Will Do, we help busy teachers and their little learners by creating awesome classroom resources which makes teachers’ lives easier and encourages kids to love learning.

Meet the Team

Join the Club!

When you join the Dollar Teachers Club, you get access to all of the printable AND digital products we’ve ever made, all of our freebies, exclusive monthly resources made just for you, and lots more, all in ONE place. Save some money, some stress, and lots of time, and join the Dollar Teachers Club today!

Learn More

Do you like freebies?

A rhyming freebie just for you...

Words That Rhyme Sort

Download!

Words That Rhyme Sort

CAT and HAT? NET and BED?
Rhyming can be tricky! Grab this Words that Rhyme Sort freebie to help your students listen for rhyming pairs.
 

Sign up for one of these FREE email courses for more helpful tips!

Small Groups Email Course

Get Started

Small Groups Email Course


Digital Learning Email Course

Get Started

Digital Learning Email Course


Name Building Email Course

Get Started

Name Building Email Course


Differentiation Email Course

Get Started

Differentiation Email Course


Join us over on Facebook for conversation, tips, and teaching ideas for your little learners!

Join the Facebook Group

Must-Read Posts from the Blog

A black piece of construction paper with a ball of foil and a grey painted moon on the paper.
The letter L made out of salt on a paper with green liquid in a dropper being dropped on
3 cups on a table in the dark with glowing liquid inside

Copyright © 2026 A Dab of Glue Will Do •  All rights reserved  •  Privacy  •  Site Design by Emily White Designs

105 shares
We use cookies to ensure that we give you the best experience on our website. If you continue to use this site we will assume that you are happy with it.